ShareX - What I like and my config
I had been using the built-in Snipping Tool for a long time since I found it so intuitive and easy to work with. However after looking at other screenshots, where steps were numbered, lots of arrows, and fancy blurring, I figured I should look for a better alternative and found ShareX.
Installation
You can get ShareX from their site https://getsharex.com/. It is free, open source, and been around for over 10 years.
Download the installer and let's take a look at the first change I do:
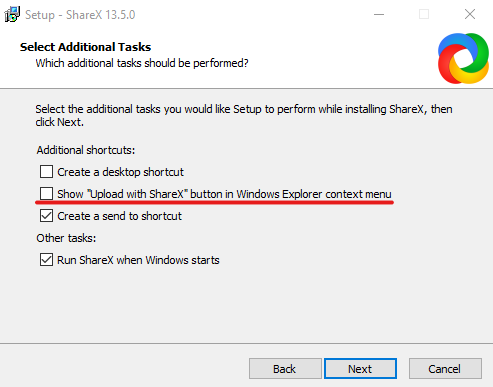
Usually I grab screenshots for documentation or for attaching in e-mails or paste them directly in a chat (Teams/Slack/Discord), therefor I don't need the option to directly upload images from my drive. Call me paranoid but this also protect me from human error where I upload something by accident. If you trust yourself more then I trust myself, keep this option checked 😃
After a few nexts, ShareX should be installed!
Configuration
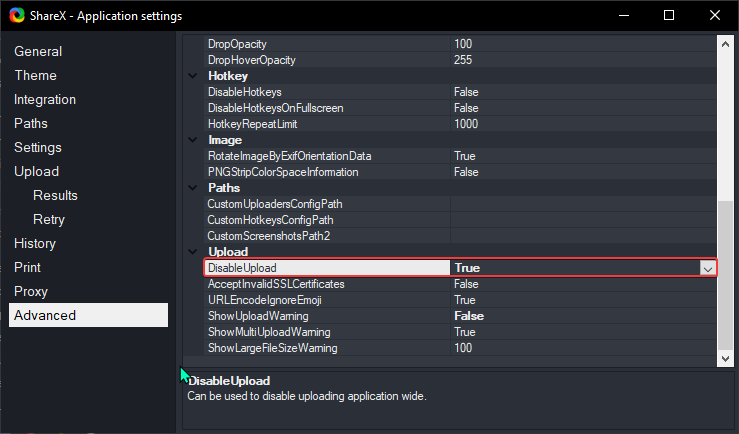
First thing I do is making sure I don't upload any images:
One thing I really like with ShareX is the easy way to implement a border and add the date on all screenshots. This is perhaps the simplest thing one can do, and you might see other uses here as well.
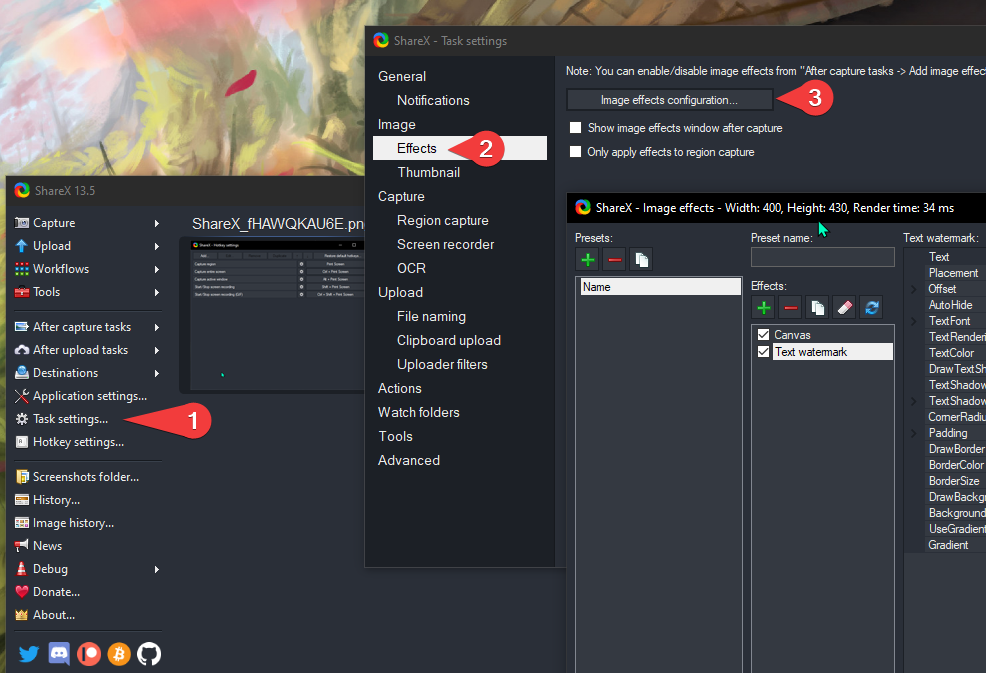
This is how I created the simple effect mentioned:
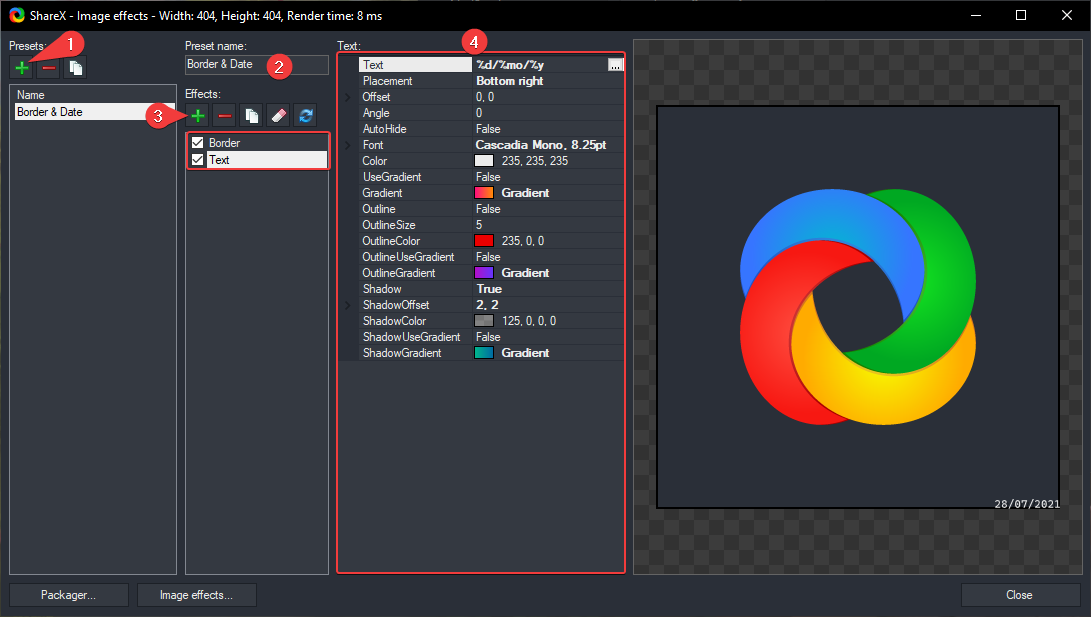
- Create a new preset
- Give it a fitting name that you can recognize
- Add your desired effects; I added a Border and Text
- Customize the properties of the effects (note you can also click the three ... for more info on each property):
- Border
- Size: 2(px)
- Text
- Text: "%d/%mo/%y"
- Placement: Bottom right
- Font: Cascadia Mono, 8.25pt
- Shadow: True
- ShadowOffset: 2,2
- Border
To add this effect to all screenshots you take:
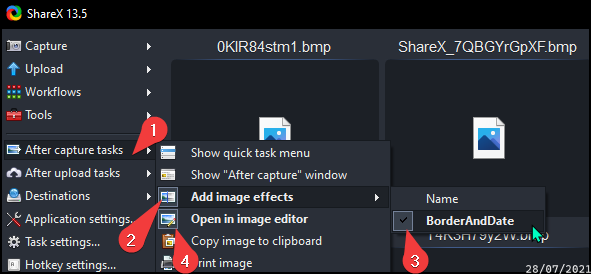
- Hover "After capture tasks"
- Click and hover "Add image effects"
- Click the effect you would like to add to all screenshots
- While we are here click the "Open in image editor"
Next let's take a look at Image Editor we just enabled. This will appear right after every capture and is where we can add more value to our images!
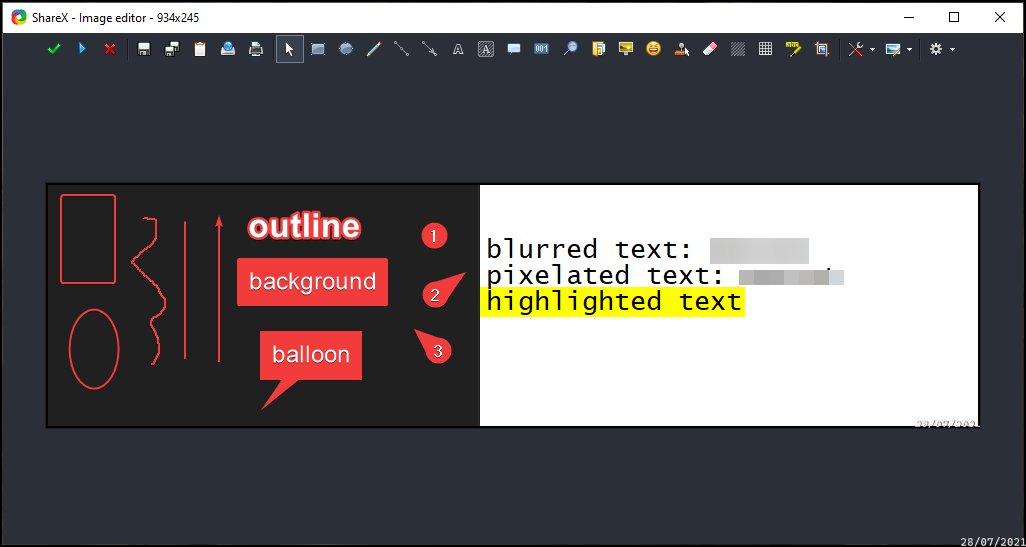
From left to right:
- Apply Changes & Continue; Apply what has been done in editor, and continue task (if there are more, example upload image)
- Continue Task; without changes from editor
- Cancel Task; jump out from editor and don't run more tasks
- Save Image; Saves image to default location
- Save Image As; Lets you control image location and name
- Copy Image to Clipboard; Copies the current edited image to your clipboard
- Upload Image; Upload it if configured
- Print Image; Print the image
- Select and Move; Select objects added, change and move them around
- Rectangle; Draw a rectangle
- Ellipse; Draw an ellipse
- Freehand; Draw horrible like in paint
- Line; Draw a line, hold Shift to lock it to 45 degree angles
- Arrow; Draw an arrow, hold Shift to lock it to 45 degree angles
- Text Outline; Add text with outline
- Text Background; Add text with background
- Speech Balloon; Add text in a speech balloon
- Step; Auto increments steps to follow, drag to point more specific.
- Magnifier; Magnify parts of the image
- Image (File); No idea
- Image (Screen); No idea
- Sticker; Add stickers for best documentation
- Cursor; Add copies of your cursor
- Smart Erase; Erase parts of image, fill with surroundings
- Blur; Blur parts of image
- Pixelate; Pixelate parts of image
- Highlight; Highlight parts of image
- Crop; Crop the image. This will destroy your image effects if you use borders! I usually just cancel and take a new screenshot.
- Edit; More editing features for the image
- Image; More editing features for the image
Now I almost exclusively use Rectangles, Arrows, and Steps. After I've done my changes I always copy the image my clipboard, paste it where I want it, and come back and hit the red X, cancel task. Any additional info I write beside wherever I end up pasting the image. I seldom need to save the image itself to disk, since it will be saved in my documentation, an e-mail, or in a chat.
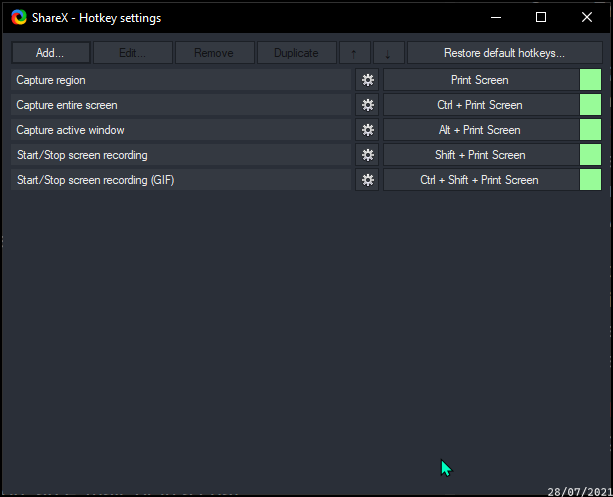 Last thing I do is change the hotkeys since 99% of my screenshots are parts of my screen. I switch the "Capture Region" and "Capture Entire Screen" hotkeys.
Other tips:
- While doing a regional capture, use the scroll wheel to change the size of the magnifier
- You can save image effects and share them
- Inside the editor, size and colors can be change for almost every added object
- Inside the editor, right click added objects to remove them
Hope you see why I enjoy ShareX. If you have more tips or sick effects, let me know!